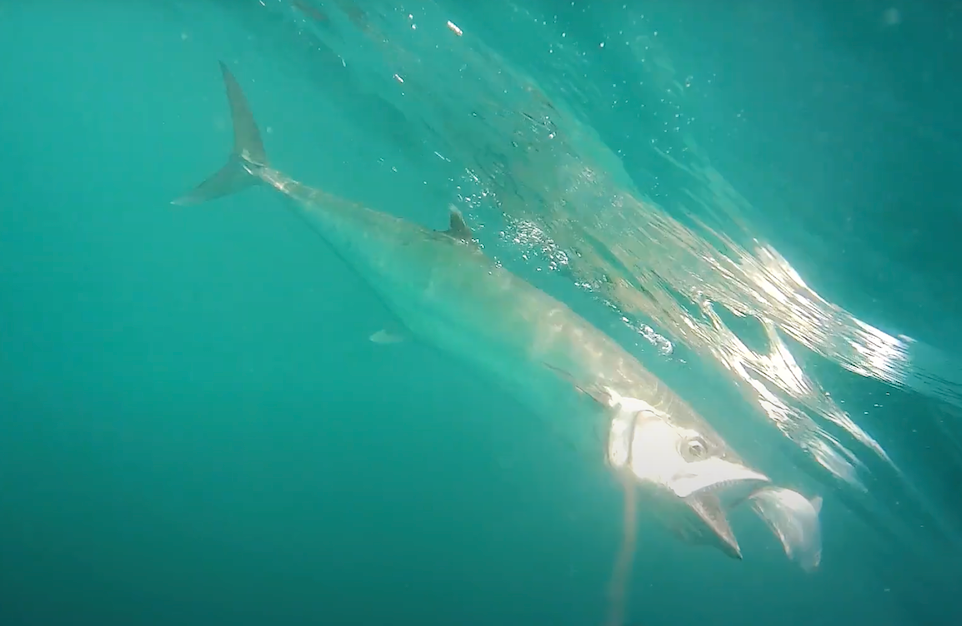
How to Film Your First Underwater Strike With a Fishing Camera
Capturing your first underwater strike is one of the most rewarding moments in modern angling. It’s where fishing meets filmmaking—an epic blend of adrenaline, curiosity, and technology. If you’ve picked up a Westin Fishing Cam and want to get started, this guide walks you through exactly how to make your first on-the-water video a success.
Whether you're casting from shore, drifting a flat, or trolling deep, you don’t need expensive gear or technical know-how to get impressive footage. You just need the right setup, a little patience, and a fish that’s feeling bold.

Step 1: Pick the Right Camera for Your Trip
Westin offers two powerful yet lightweight underwater cameras—the Explore Cam and the Escape Cam. Both shoot in crisp 1080p HD at 30 or 60 frames per second and are waterproof down to 650 feet. The difference comes down to your fishing style:
- Explore Cam: Ultra-light (under 1 oz), perfect for casting, finesse presentations, and shallow water. The small profile minimizes drag and lets you use lighter tackle.
- Escape Cam: Slightly larger (1.4 oz) with a stabilizing Y-fin and longer battery life (up to 2.5 hours). Ideal for trolling, bottom bouncing, or filming long sessions with heavier gear.
Both models offer tool-free operation, making them a great option for anglers who want to spend less time fiddling with gear and more time catching fish (and filming it).
Step 2: Get Familiar With the Camera Before You Hit the Water
Before your first trip, charge the camera fully and run a few practice tests at home. Learn how to:
- Power the camera on/off
- Start and stop recording quickly
- Connect to your phone or computer to review footage
If you have access to a pool or a clear tub, toss the camera in and attach it to a short line or mock leader. This gives you a sense of how it behaves in the water, and you can experiment with different angles. A clean, pre-tested setup means no surprises when you're on the water with fish on the line.

Step 3: Mount the Camera for Maximum Footage
To capture your lure and the strike in the same frame, attach the Westin Cam 2 to 4 feet in front of your lure. This setup offers a wide, centered view of the action without crowding the bait. Here’s a typical rig:
- Main line to a strong barrel swivel
- Camera connected via short leader or swivel clip
- Leader (2–4 feet) trailing to the lure or bait
Make sure to use a high-quality swivel to prevent line twist, especially when trolling. Keep your leader as straight as possible to avoid tangles or bait interference with the camera lens.
Step 4: Fish the Right Conditions
Filming underwater isn’t just about the setup—it’s also about the environment. Underwater visibility depends on sunlight, water clarity, and depth. For your first few sessions, look for:
- Midday sun: Light penetrates deepest from 10 AM to 2 PM.
- Clear to lightly stained water: Avoid algae blooms, runoff, or heavy sediment.
- Shallow to mid-depth zones: Start between 5–15 feet where light still reaches.
If you're trolling or drifting, stay below the boat's prop wash to keep the water calm around your lure. The Escape Cam’s stabilizer helps in these situations, but all footage benefits from smooth conditions.
Step 5: Record, Review, Adjust, Repeat
Start filming and fish normally. You don’t need to overthink it—just make a few casts, troll a short run, and stop recording. Then, review your footage:
- Did you see your lure clearly in frame?
- Was there wobble or lens distortion?
- Any fish follow, strike, or inspect your lure?
Use this feedback to tweak your leader length, lure choice, or camera position. It often takes 2–3 tries to get the perfect angle—but when it clicks, it’s magic. The Westin interface makes it easy to delete test clips and record fresh ones without hassle.
Step 6: Capture That Strike!
Eventually, you’ll capture the shot you’ve been waiting for—a fish appearing out of the murk, zeroing in, and smashing your bait. Some strikes are slow-motion stalks, others are lightning-fast ambushes. Every one is pure gold on camera.
To increase your odds, try mixing up retrieves: twitch, pause, slow roll. You’ll quickly see what triggers the most aggressive reactions. Some species—like pike, redfish, or smallmouth—put on a show every time. Others, like trout or snook, may require more finesse to trigger a committed strike.
Once you land a fish, stop recording to conserve battery. Use the footage for learning, bragging rights, or building your content library.

Bonus: Best Lures to Use for Underwater Footage
Some lures just look better on camera—and trigger more fish because of it. Here are a few proven winners:
- Paddle Tail Swimbaits: The tail thump adds a hypnotic rhythm to your footage. Ideal for redfish, bass, snook, and pike.
- Jerkbaits: Erratic darting motion pulls fish into the frame fast. Great for clear water and reaction strikes.
- Spinnerbaits: Flash and vibration attract from a distance, making them visible even in stained water.
- Spoons: Their fluttering fall and shine look incredible on camera, especially when jigged vertically.
- Topwater Walkers (for shallow camera setups): Surface action is visible both above and below if timed right with a shallow cam mount.
Want the best of both worlds? Use a trailer hook. Footage often shows fish striking short or swiping the tail—extra hooks improve hookup and increase the odds of capturing the full strike in-frame.

Filming your first underwater strike turns fishing into something cinematic. You’re no longer guessing what happened below the surface—you’re seeing it in real time, in full HD. And the best part? You can learn from every clip, fine-tune your tactics, and relive the moment again and again.

So charge that Westin Cam, hit the water, and let the fish do the talking.
