The Lure-Cam Field Guide: Rigs, Shot Recipes, and an Editing Workflow That Actually Works
You want to bring viewers underwater and make every strike tell a story. Use this practical companion to your main lure-cam post to rig smarter, capture cleaner shots, and move from raw clips to finished edits without wasting time.
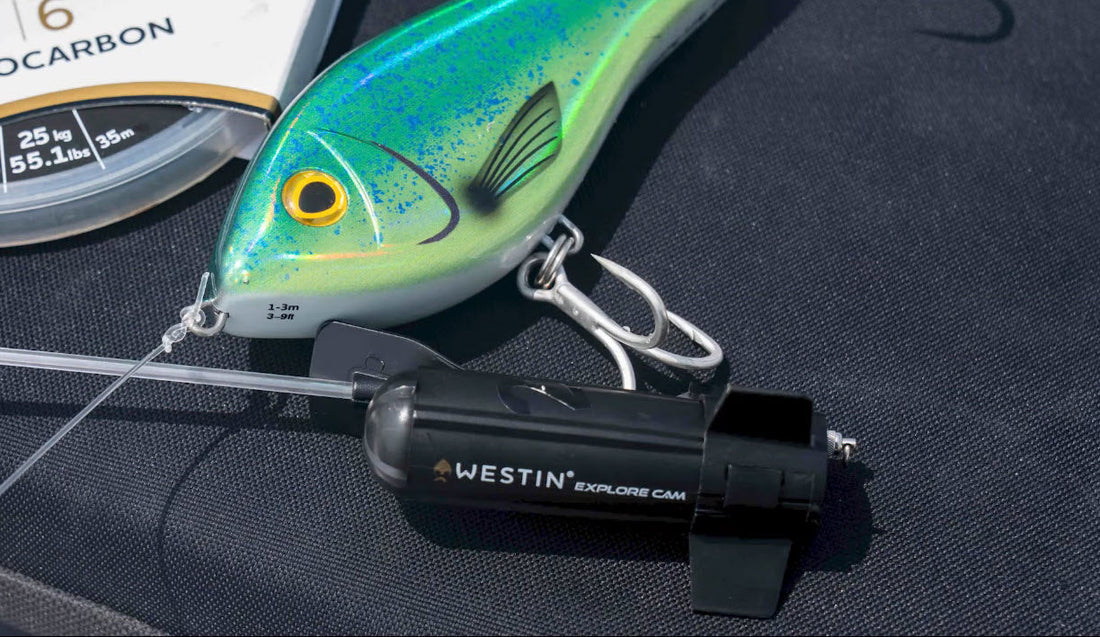
Quick Spec Cheat Sheet
- Westin Explore Cam – 1080p at 30 or 60 fps, ultra light, waterproof to 650 ft, about 1 hr 25 min runtime. Ideal for finesse casting where lure action and low drag matter.
- Westin Escape Cam – 1080p Full HD, up to 2.5 hours runtime, Y-fin stabilization plus a Dive Lip to help hold depth. Great for trolling and deeper structure where stability matters.
Core Rigging Principles
- Distance to lure: 2–4 ft. Close enough to frame the action, far enough to avoid crowding the lure.
- Preserve lure motion. Use a loop knot on the lure and a small high-quality swivel above the camera to cut line twist without choking action.
- Balance the system. Explore for finesse and casting. Escape for current, speed, and long sessions.
- Chase light. Midday sun, clear water, and moderate depth give the best color and contrast.
- Speed vs blur. Slower retrieves make smoother footage. Faster retrieves can trigger reaction strikes but add motion blur.
Five Proven Rigging Recipes
1) Finesse Casting, Natural Action (Explore Cam)
Use when: Jerkbaits, small swimbaits, spybaits, Ned rigs. Setup: Main line → micro barrel swivel → 18–24 in leader → Explore Cam → 24–36 in leader → lure (loop knot). Notes: Smooth rod sweeps and deliberate pauses show followers clearly.
2) Power Swimbait or Pike and Muskie Hunt (Escape Cam)
Use when: 5–8 in soft swimbaits, glides, heavy spinnerbaits. Setup: Main line → strong swivel → 12–18 in leader → Escape Cam (Y-fin on) → 30–48 in leader → lure. Notes: Stabilization reduces roll so the lure stays framed even on faster retrieves.
3) Crankbait or Trolling Track Shot (Escape Cam + Dive Lip)
Use when: Working breaks, weed edges, or suspended bait. Setup: Main line → swivel → 18 in leader → Escape Cam with Y-fin and Dive Lip → 48–72 in leader → crankbait. Notes: Dive Lip helps the camera hold the water column without extra weight.
4) Vertical Jigging Lift-Drop (Explore Cam)
Use when: Walleye spoons, lake trout tubes, snap jigging. Setup: Main line → Explore Cam → 24–36 in leader → jig. Notes: Camera above the lure captures followers rising into frame.
5) Surf or Current Situations (Escape Cam)
Use when: Inlets, moving water, nearshore salt. Setup: Main line → swivel → 12–18 in leader → Escape Cam (Y-fin on) → 36–60 in leader → metal spoon or plug. Notes: Stabilization fights surge and keeps the frame readable.
Shot Recipes
- Follow and Flare: Pause along shade lines or cover. Look for the side-on inspection and gill flare.
- The Miss and Fix: After a miss, repeat with a micro change like a shorter pause or small speed-up. Footage shows why they bailed.
- Bottom Kiss: Lightly tick bottom, then lift. The sediment puff is easy to spot on the timeline.
- Reverse Angle Troll: Run the camera 4–6 ft ahead of a wobbling bait to catch followers materializing from behind.
On-Water Workflow
- Pre-launch: Format the card, clean the lens, and record a 3-second slate naming lake, date, species, and lure.
- Sun check: If light is poor, go shallower or pick higher-contrast lures.
- Micro-test: Make a 10-second cast to verify framing before you commit.
- Session blocks: Film in 15–25 minute windows to match battery life and simplify review.
- Quick review: Spot-check one clip on your phone before leaving a spot.
Troubleshooting
- Wobbly or jello footage: Slow the retrieve, add a quality swivel, or switch to Escape with stabilization.
- Camera will not stay down: Use the Dive Lip on the Escape Cam before adding weights.
- Lure looks dead: Add 6–12 in to the trailing leader or use a loop knot to restore action.
- Muddy color: Go shallower or find clearer water. High-contrast lure patterns help.
- Foggy at launch: Avoid sudden temperature shocks and keep ports dry.
Simple Editing Workflow
- Cull fast: Delete half-framed, shaky, or empty stretches. Keep pauses, follows, and strikes.
- Build mini sequences: Follow → adjustment → bite. Use short speed ramps only to highlight commitment moments.
- Add context overlays: Include lure, leader length, approximate depth, retrieve tempo so clips teach as well as entertain.
- Color and clarity: Minimal stabilization if you shot with Escape. Light contrast and midtone tweaks until scales pop, then stop.
- Export smart: 1080p at 30 fps for general delivery or 60 fps if the source was 60 and you want cleaner slow motion.
Quick Reference Table
| Goal | Camera | Distance to Lure | Retrieve or Speed | Notes |
|---|---|---|---|---|
| Natural finesse action | Explore | 2–3 ft | Slow to moderate | Smooth rod work preserves lifelike motion |
| Long stable runs | Escape | 3–6 ft | Moderate | Y-fin smooths roll for trolling and covering water |
| Vertical jig clarity | Explore | 2–3 ft (below camera) | Lift-drop | Followers rise into frame naturally |
| Hold depth in current | Escape + Dive Lip | 4–6 ft | Steady | Dive Lip maintains column without extra weight |
Care, Ethics, and Common Sense
- Follow local rules for camera attachments.
- Handle fish quickly and never use the camera as a lifting handle.
- Rinse after salt, dry the ports, and store warm and dry between trips.
Underwater cameras are feedback machines. Explore gives you lightweight, finesse-first intelligence and quick reviews on the water. Escape adds stabilization and runtime for tracking, trolling, and deeper structure. Pair the right rig with the right conditions, shoot for clarity over chaos, and turn each trip into a story that teaches and entertains.